While my client isn’t using container technology like Docker, it is something that I have been working with a lot recently, so I took it upon myself to explore the Azure Container Service (ACS). I have to say, I was pleasantly surprised by how easy it was to get started.
Getting Started with the Azure Container Service
The first thing that you’ll notice about Microsoft Azure is that it is significantly different than its primary competitor, Amazon AWS. With an application marketplace, Azure seems more focused on being able to quickly spin up resources with as little overhead as possible. This allows for skipping some steps when it comes to setting up open source services. Because of the simplicity of the Marketplace, getting started with the Azure Container Service is as simple as running a search.
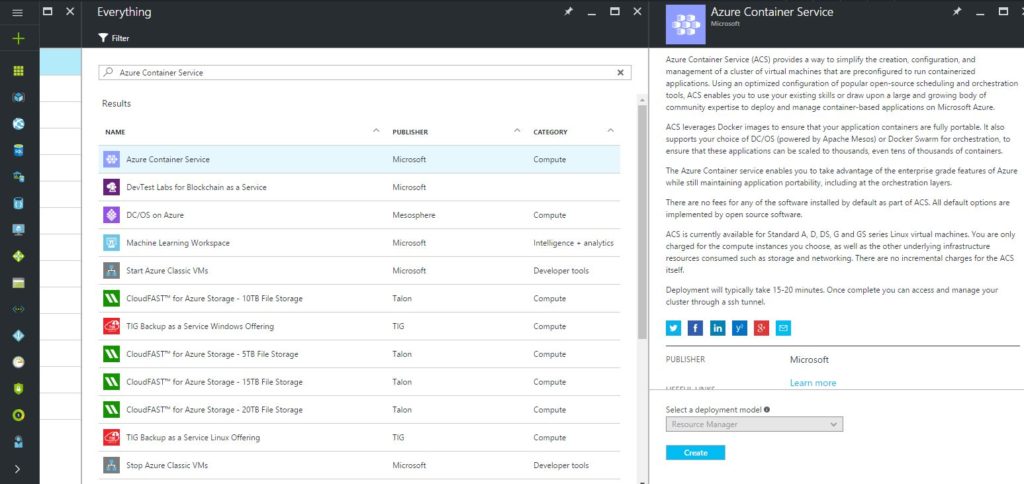
Find Azure Container Service on the Marketplace.
Once you’ve found the Azure Container Service (the one published by Microsoft), click the “Create” link. This will bring up a simple step-by-step setup process for your container cluster.
Step 1 – Azure Container Service Basics
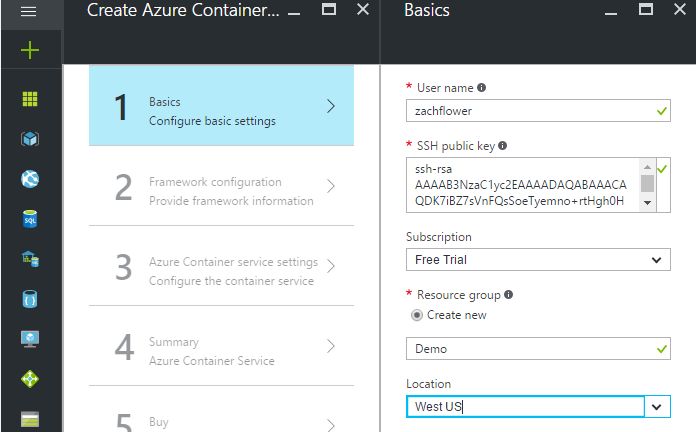
Configuring Basic Settings for an Azure Container.
The first step in creating your ACS is to set up your user information, SSH public key, and resource group. Like any good SSH configuration, Azure servers use public key authentication. This is a more secure authentication method that allows you to log into a remote server without having to create (or remember) a password.
If SSH keys are a new concept to you, finding (or generating) one is a pretty straightforward process, but I’ve found that GitHub has a far better walkthrough than I could ever write.
In addition to setting up your username and SSH public key, you also need to set up your resource group. The resource group does exactly what its name implies: it groups your resources. You can either create a new one (as shown in the screenshot above), or you can pick an existing one to add the Container Service to.
Step 2 – Container Framework Configuration
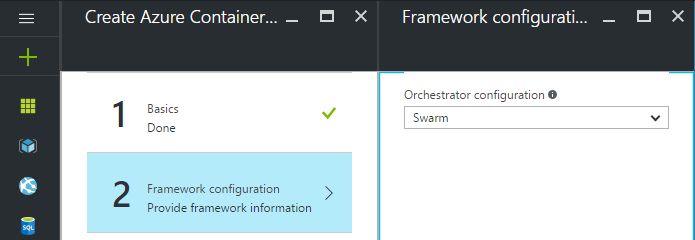
Providing Framework Information for Your Container.
After setting up authentication and grouping your resources, you’ll need to decide on your container orchestrator. The available options here are Docker Swarm and DC/OS. To be honest, each solution has its own benefits and drawbacks, but if you are new to Docker, I recommend using Swarm because it is Docker’s native clustering solution.
Step 3 – Azure Container Service Settings
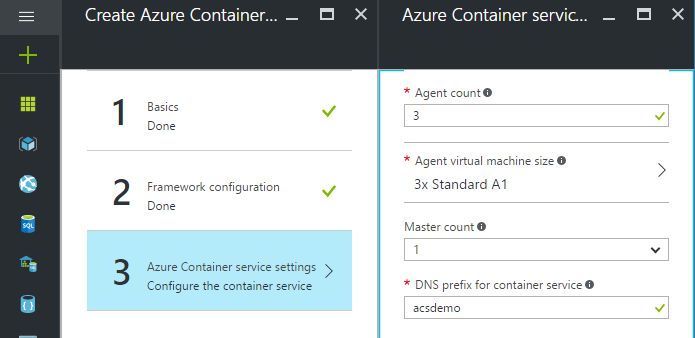
Configuring the Azure Container Service.
The next step in the process is to set up some basic rules for your cluster. This can seem a bit confusing at first glance, but in reality, all you are doing is telling ACS how many masters and agents to spin up in your cluster. While the master count is pretty straightforward, the agent count might not be immediately clear.
In Docker Swarm, this number is for the initial number of agents in the agent scale set. The same is also true for DC/OS, but indicates the initial number of agents in the private scale set. It’s important to note that a public scale set is also created here, depending on the number of masters in the cluster (1 master = 1 agent, 3-5 masters = 2 agents).
Step 4 – Summary and Validation
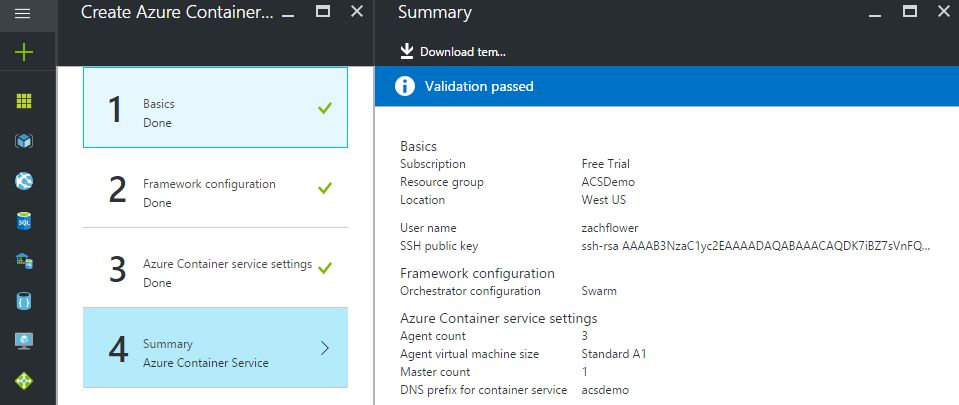
Reviewing the Azure Container Service Summary.
The summary step is pretty self-explanatory, but it is important to discuss the validation process here. My first time around with ACS, I got stuck on this page because of a timed out validation process. The ultimate problem was that my internet went out, so the asynchronous response from the validator didn’t come through.
Because I was unable to continue to the next step without a successful validation, I made the (wrong) assumption that I was done and closed out of the process. After some clicking around, I realized I needed to pick back up where I left off and wait for validation to pass before moving on to the next step.
Step 5 – Buy Your Azure Deployment
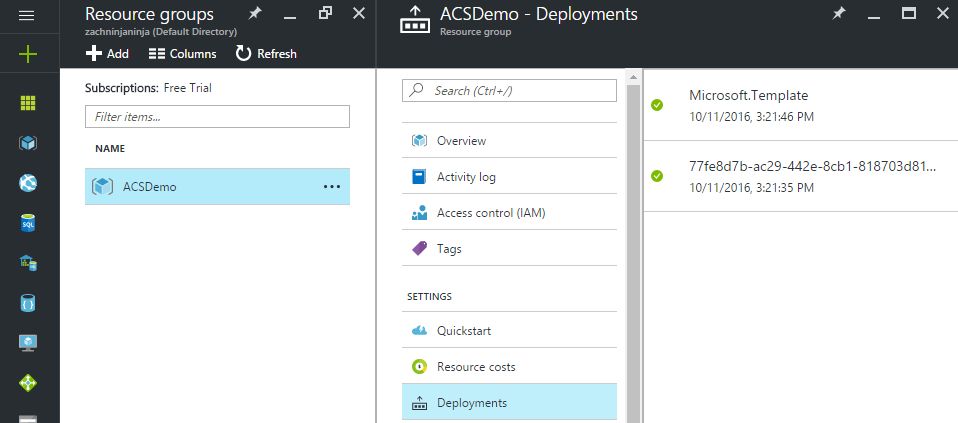
Explore the Azure Resource Group.
Once the configuration process is all said and done, all that is left is to purchase your deployment. I didn’t include a screenshot of this step for obvious reasons, but it is important to note that once you purchase your deployment, it might take some time for everything to be provisioned.
As shown in the screenshot above, once the deployment is provisioned, all of the necessary information will be accessible through the resource group indicated in the configuration process.
Connecting to the Swarm
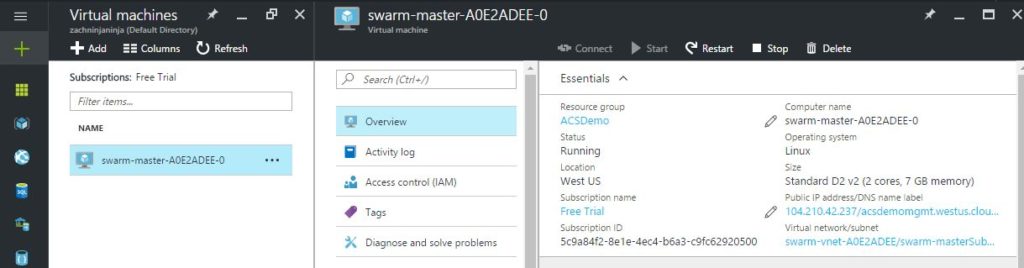
Launch Containers Using the Swarm Master Overview.
Now that we’ve created our Swarm master, we need to actually launch some containers. To do this, first navigate to your new Swarm master virtual machine and take note of the public IP address (in this case, 104.210.24.237). In order to work with our new Swarm master, we will need to use this public IP address and create an SSH tunnel. The process of doing so differs between operating systems, but in a standard Linux-based environment, the command to do so is pretty straightforward:
ssh -L 2375:localhost:2375 -f -N username@ip -p 2200
Next, we need to tell Docker about this tunnel so we can control the swarm using our standard local Docker commands. To do so, we simply need to update the DOCKER_HOST environment variable with the configured port:
export DOCKER_HOST=:2375
Now, any Docker command we run will be piped through our SSH tunnel directly into our Azure swarm. It’s important to note that the export command only lasts until your terminal session ends, which means that if you open a new session, you will need to re-export your DOCKER_HOST to control your Azure swarm.
Business as Usual with Your New Azure Swarm
Once you’ve got your SSH tunnel created, and your Docker host variable exported, you can interface with your Azure Swarm as if it is running on your own machine. Let’s take an example straight from Azure’s own documentation and spin up a new Docker container on our swarm.
docker run -d -p 80:80 yeasy/simple-web
As with any other Docker host, this command spins up a container from the yeasy/simple-web Docker image. Once the container loads, you can see it in action on the DNS name shown in your Swarm master profile.
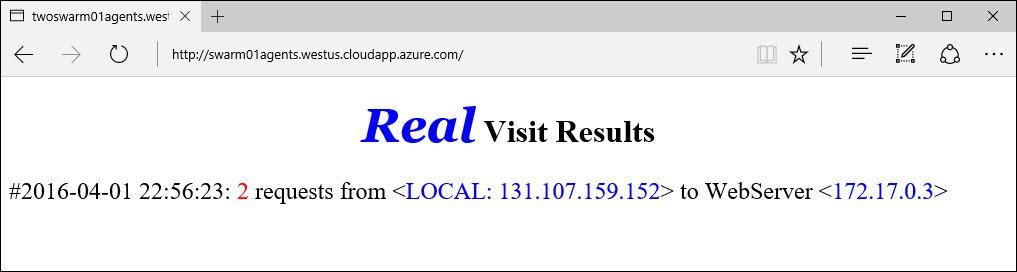
A Simple Web Docker Image.
That’s it! Managing your containers in the Azure Container service is an incredibly simple and straightforward process. By allowing you to interface with the swarm using your standard local Docker commands, the learning curve is very low, which speeds up your workflow and reduces the growing pains typically associated with learning a new technology.
About the Author
Zachary Flower (@zachflower) is a freelance web developer, writer, and polymath. He has an eye for simplicity and usability, and strives to build products with both the end user and business goals in mind. From building projects for the NSA to creating features for companies like Name.com and Buffer, Zach has always taken a strong stand against needlessly reinventing the wheel, often advocating for the use of well established third-party and open source services and solutions to improve the efficiency and reliability of a development project.
