Webhook Connection for Opsgenie

Webhook connections rely on HTTP endpoints that tell Sumo Logic where to send data. You can set up any number of connections.
Sumo Logic to Opsgenie Integration
Sumo Logic alerts can send webhook alerts to Opsgenie that acts as a dispatcher and determines the right people to notify based on your on-call schedule.
To add a Sumo Logic integration in Opsgenie, do the following:
- Go to Opsgenie Integration Page.
- Specify the following parameters:
- Provide the Name.
- Add the team who will be notified of Sumo Logic Alerts.
- Copy the Integration Url, it is used in Sumo Logic while setting up the Webhook Connection.
noteFor Free and Essentials plans, you can only add the integration from the Team Dashboard. Use the alternative instructions. To add an integration directly to a team, navigate to the Team Dashboard and open the Integrations tab. Click Add Integration and search for Sumo Logic and click add.
- Click Save Integration.
Your configuration in Opsgenie should look something like the following: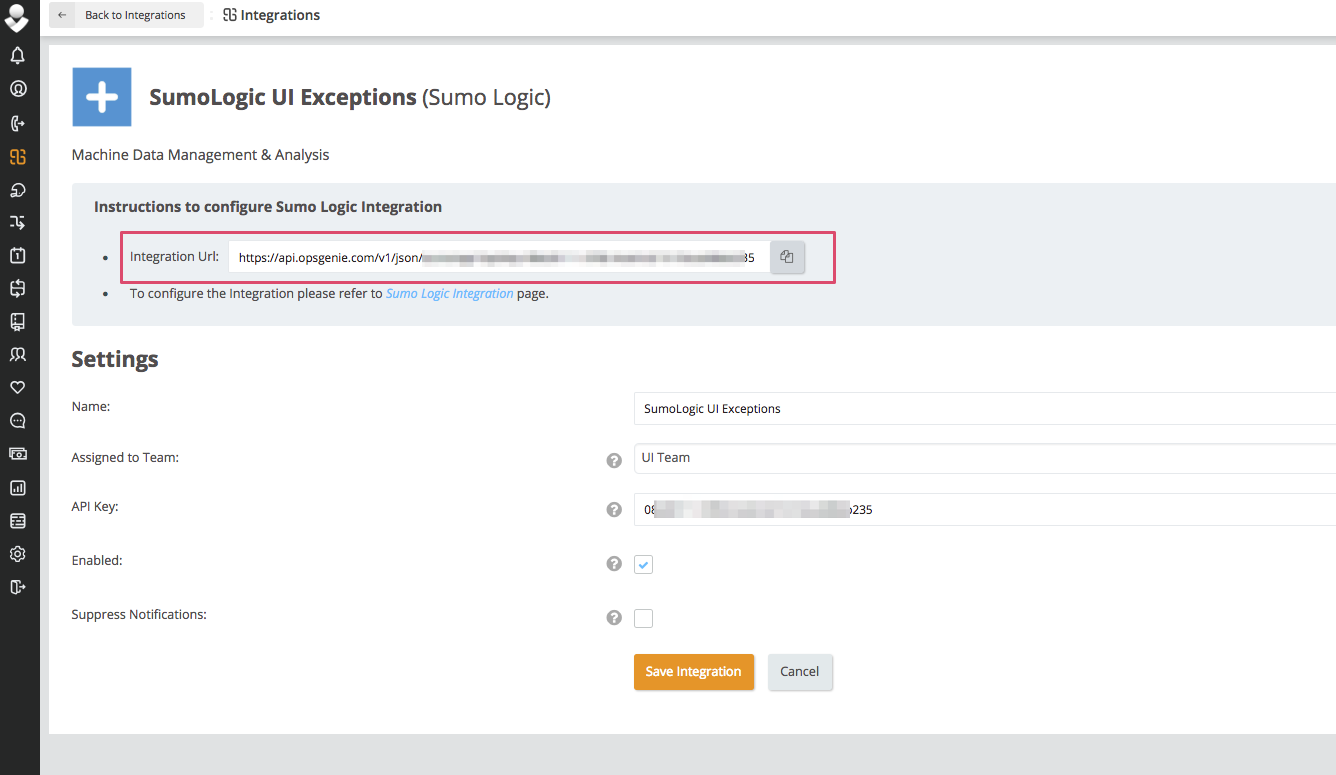
Configuration in Sumo Logic
In Sumo Logic, scheduled searches send alerts to other tools via webhook connections. To send alerts from Sumo Logic to Opsgenie :
- Create a Webhook Connection.
- Once you set up the webhook connection, you'll have the option to use it in a Scheduled Search or Monitor.
Create a Webhook Connection
You need the Manage connections role capability to create webhook connections.
This section demonstrates how to create a webhook connection from Sumo Logic to Opsgenie.
- New UI. In the main Sumo Logic menu select Monitoring > Connections. You can also click the Go To... menu at the top of the screen and select Connections.
Classic UI. In the main Sumo Logic menu, select Manage Data > Monitoring > Connections. - On the Connections page, click + Add.
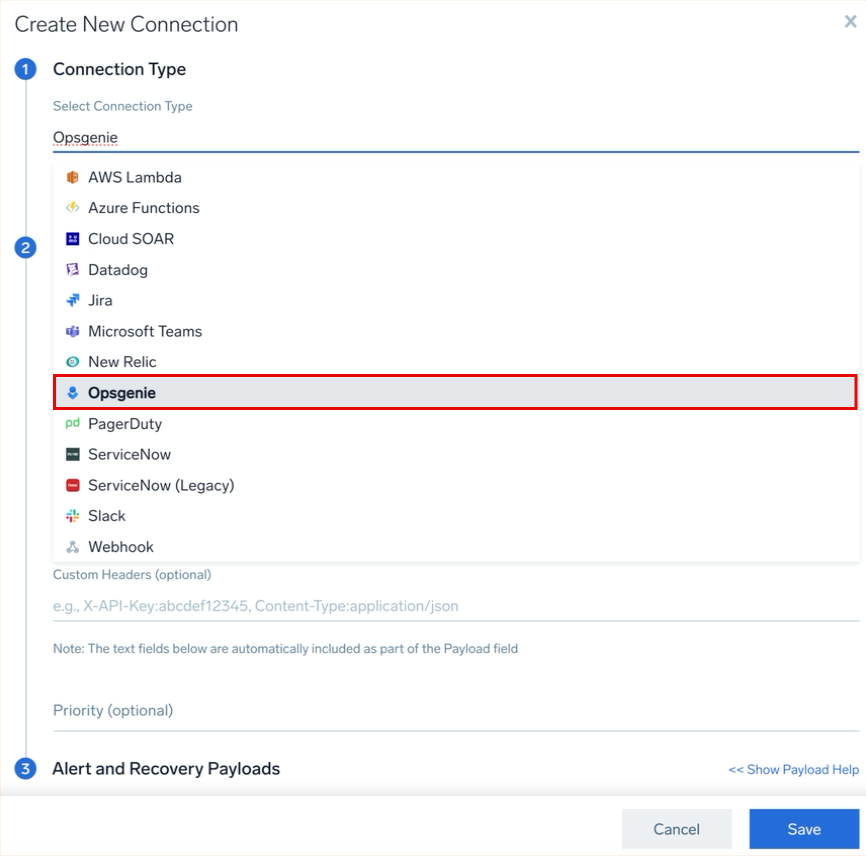
- For Connection Type, select Opsgenie from the dropdown.
- In the Connection Settings dialog, enter:
- Name. Enter a name for the connection.
- (Optional) Description. Enter a description for the connection.
- URL. Enter the Integration Url from Opsgenie into the URL field.
- (Optional) Authorization Header. Enter an authorization header, which may include an authorization token.
- (Optional) Custom Headers. Enter up to five comma separated key-value pairs.
- (Optional) Priority. Opsgenie uses the Priority value to define the priority of alerts. Edits to the Priority value are automatically updated in the JSON payload and vice versa.
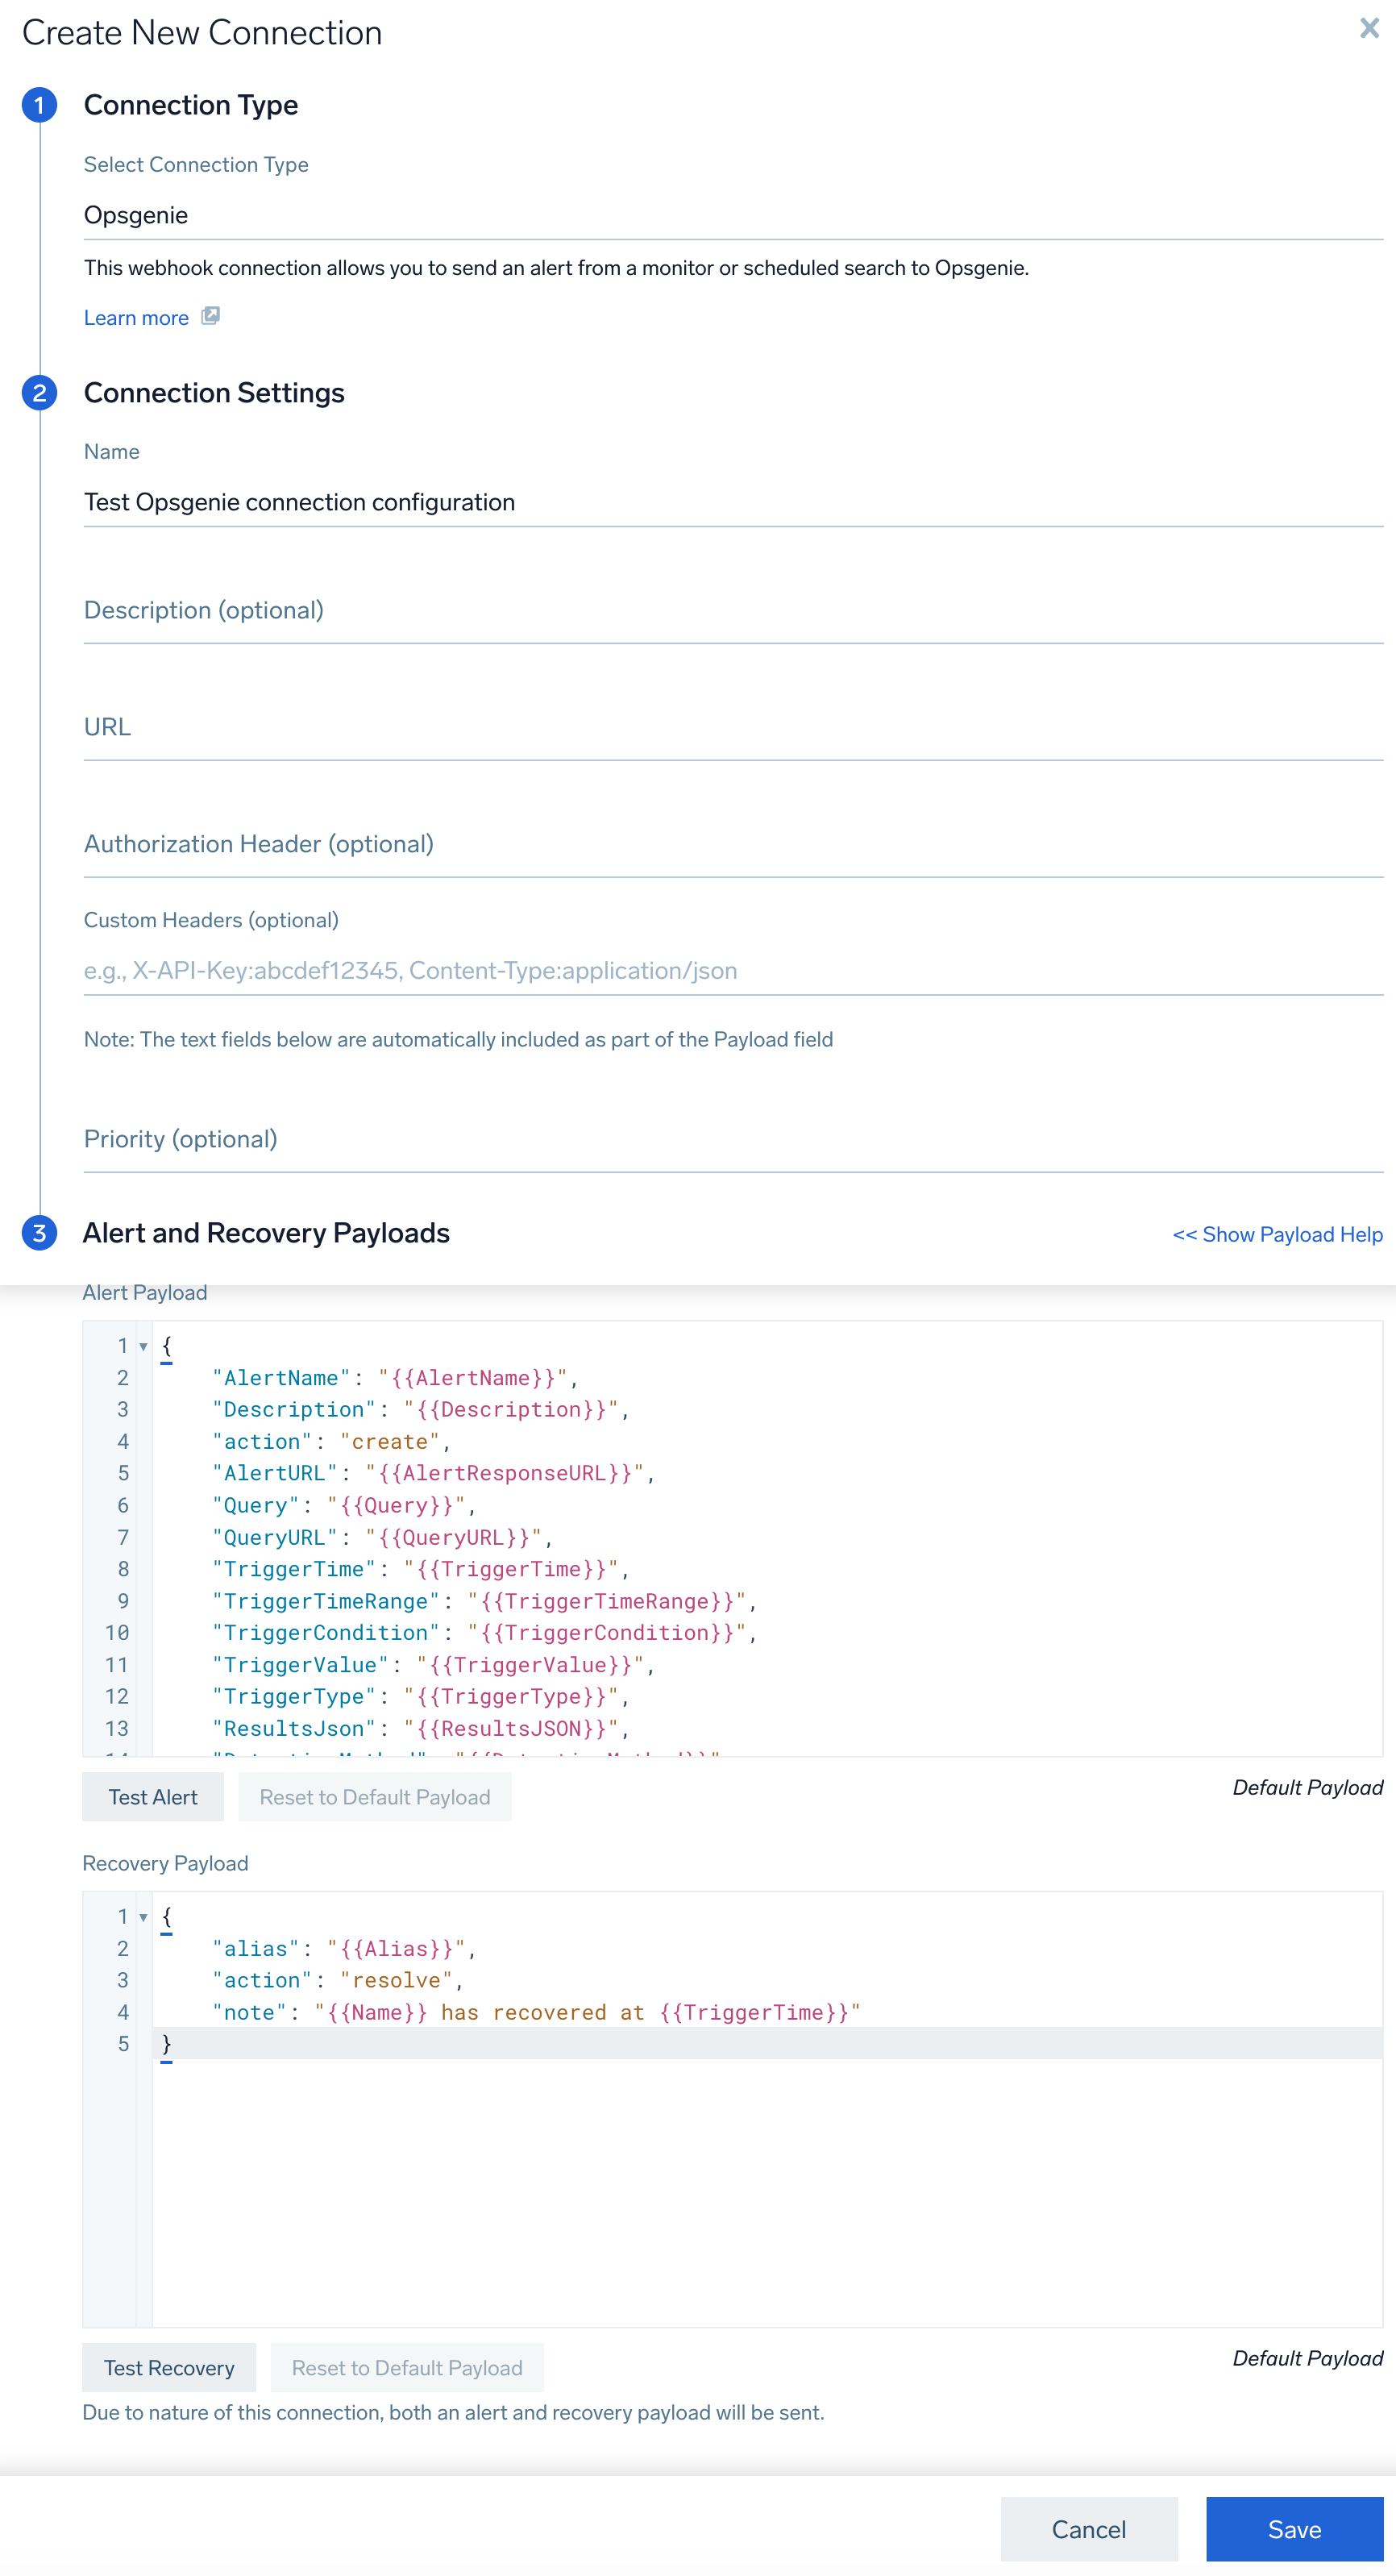
- The following JSON is the default Alert Payload, you can customize it as needed. For details on variables you can use as parameters within your JSON object, see Configure Webhook payload variables.
{
 "AlertName": "{{AlertName}}",
 "Description": "{{Description}}",
 "action": "create",
 "AlertURL": "{{AlertResponseURL}}",
 "Query": "{{Query}}",
 "QueryURL": "{{QueryURL}}",
 "TriggerTime": "{{TriggerTime}}",
 "TriggerTimeRange": "{{TriggerTimeRange}}",
 "TriggerCondition": "{{TriggerCondition}}",
 "TriggerValue": "{{TriggerValue}}",
 "TriggerType": "{{TriggerType}}",
 "ResultsJson": "{{ResultsJSON}}",
 "DetectionMethod": "{{DetectionMethod}}",
 "MonitorType": "{{MonitorType}}",
 "NumQueryResults": "{{NumQueryResults}}",
 "SourceURL": "{{SourceURL}}"
} - Under Recovery Payload, you can customize your recovery notification.
- Click Test Alert or Test Recovery to test the connection. If successful, you'll see a
200 OKresponse message. - Click Save.