Macros
Macros allow you to reference a predefined set of query language syntax across multiple queries. This enables reuse of commonly used logic, improves consistency, and reduces duplication. Macros can optionally accept arguments. When arguments are provided, the macro evaluates them dynamically and applies the resulting logic within the query.
To use macro in your log query, reference it with backticks (`) as shown below:
`<macro name>`
Macros can also be nested to enable reuse of complex queries:
- Nested Macros. A macro referenced inside another macro.
- Inner Macro. A macro used within the context of another macro query.
- Outer Macro. The macro that references an inner macro.
- Only Administrators and Users with access to Query Reference can run queries using macros.
- Only users with Manage Macro capability can create macros.
Add a macro
To create a macro, follow the steps below:
- New UI. In the main Sumo Logic menu, select Data Management, and then under Logs, select Macros. You can also click the Go To... menu at the top of the screen and select Macros.
Classic UI. In the main Sumo Logic menu, select Manage Data > Logs > Macros. - Click + Add Macro.
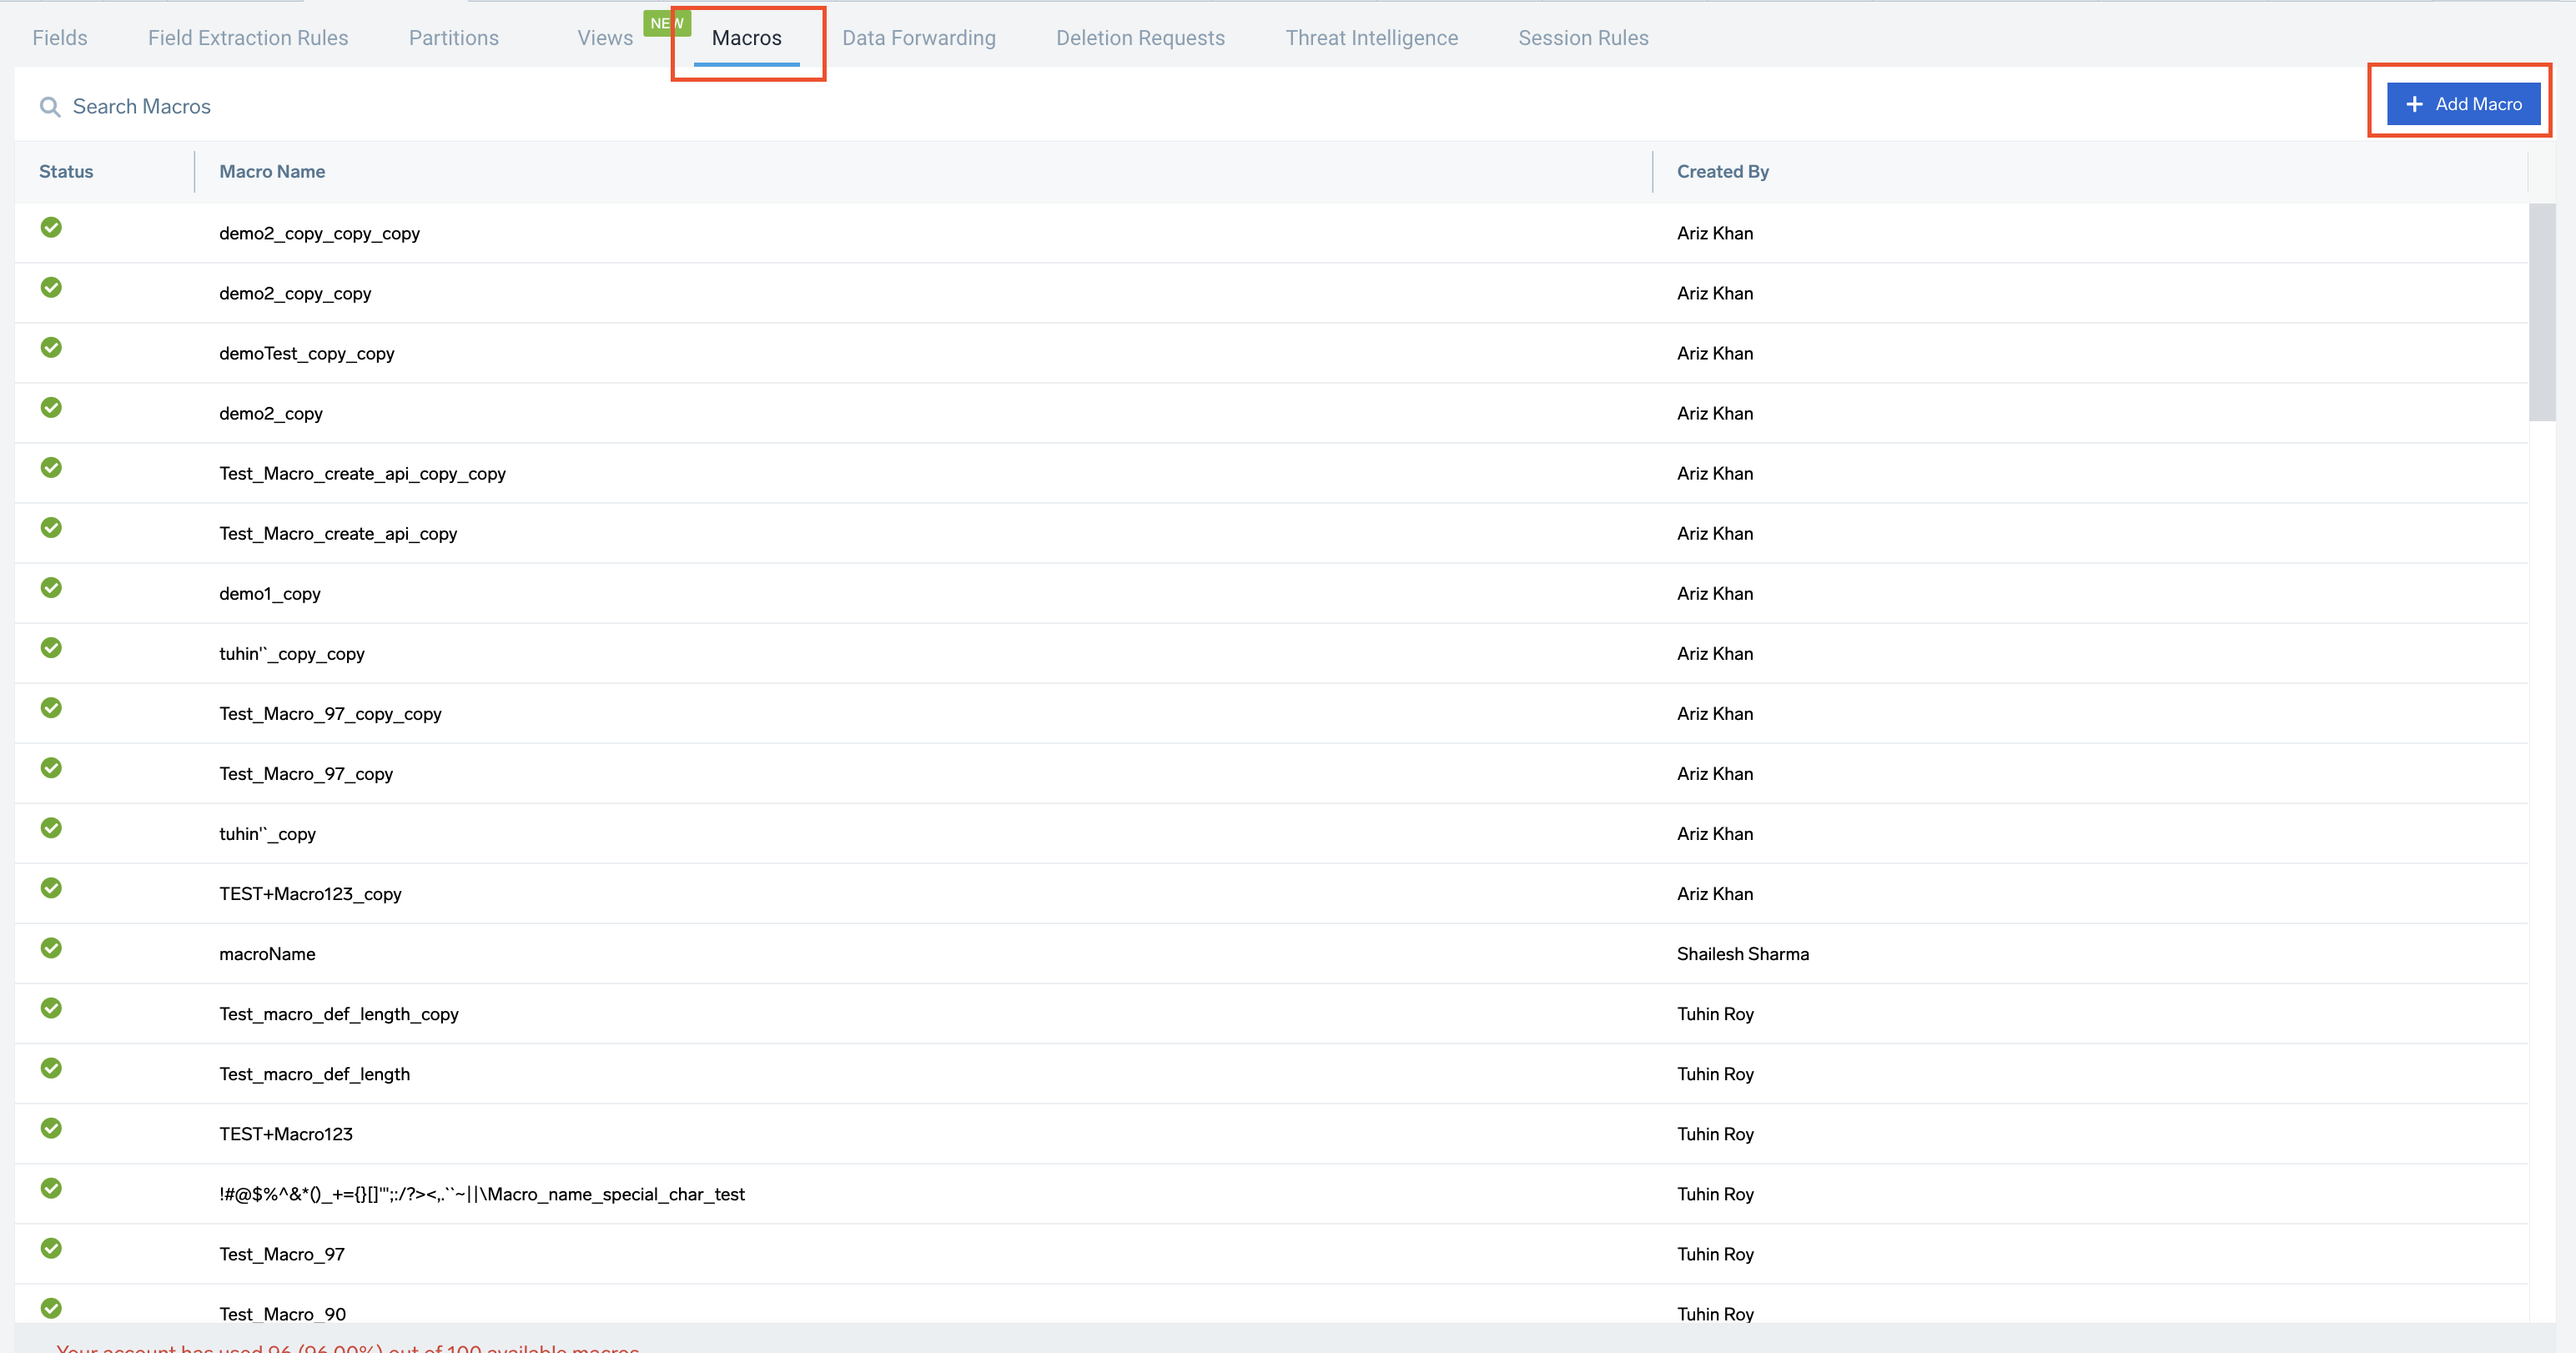
- Or, in the log search page, select the part of search query language that needs to be reused and click on Create Macro.

- In the Create Macro page, enter the following details:
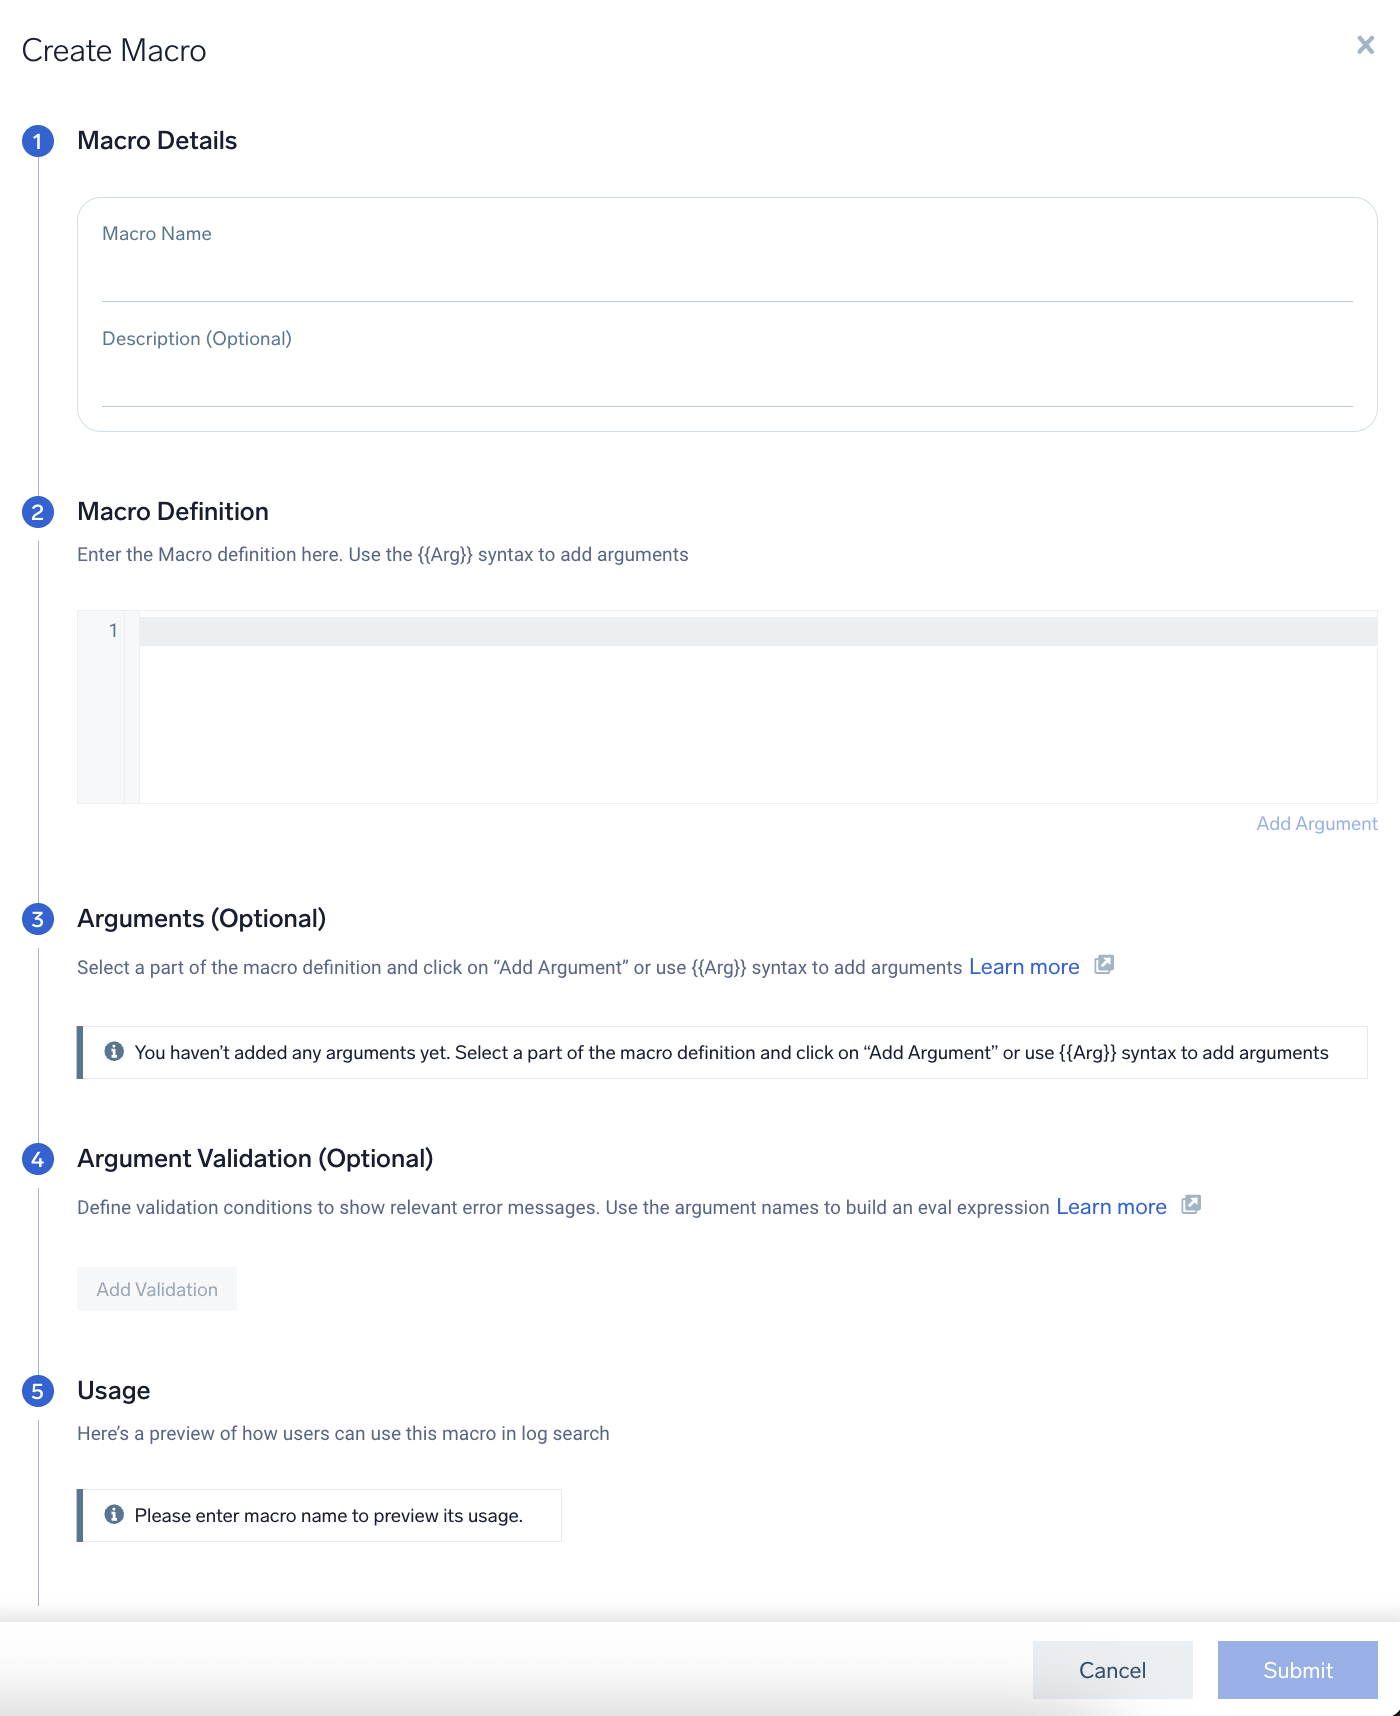
- Macro Details. Enter the name for the macro. Description is optional.
- Macro Definition. Enter the definition for the macro. To add arguments use the
{{Arg}}syntax or select a part of the definition and click on Add Argument. - (Optional) Arguments. Enter the name and select the data type for the argument selected.
- (Optional) Argument Validation. Define the validation condition and enter the error message that needs to be shown when the validation expression returns false.
- Usage. Preview of how you use the macro in the log search.
- Click Submit to save the macro.
Limitations
- You can create a maximum of 600 macros.
- You can add a maximum of 5 arguments.
- You are only allowed to use single expression.
- You can only use the below listed argument validations:
isValidIpV4containsisNumericisPrivateIPisPublicIPisValidIPisReservedIPisValidIPv4isValidIPv6matches
- You can only use the below listed rules language functions:
<=>===!=<>
Example without arguments
Consider the below query, which searches for errors with timeslice of 5 minutes.
_sourceCategory=error | timeslice 5m
| count by _timeslice
Now, by creating a macro for the timeslice field, the query using this macro can be simplified as follows:
_sourceCategory=error | `timeslice_macro`
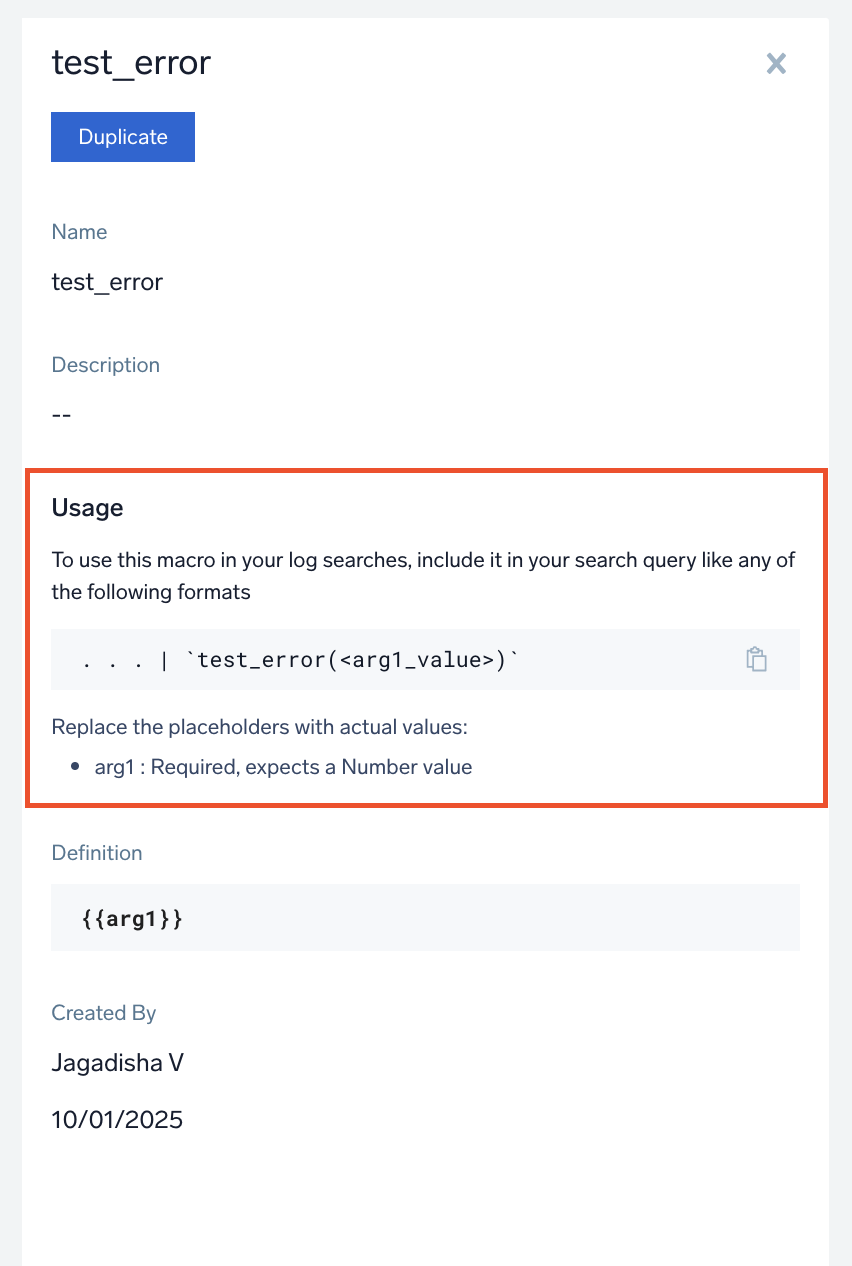
Example with arguments
Consider the below query, which searches for errors with timeslice for time of your choice.
_sourceCategory=error | timeslice 5m
| count by _timeslice
To create a macro that allows you to enter a value of your choice, we use arguments during the macro creation process. You may choose to include validation conditions within these arguments. If validation conditions are present, make sure to specify the correct data type for <arg1_value> to achieve the desired results.
The following is a simplified version of the query that uses the macro with arguments. Replace <arg1_value> with the value of your choice.
_sourceCategory=error | `timeslice_macro(<arg1_value>)`
View and use the macro
To view any existing macro, follow the steps below:
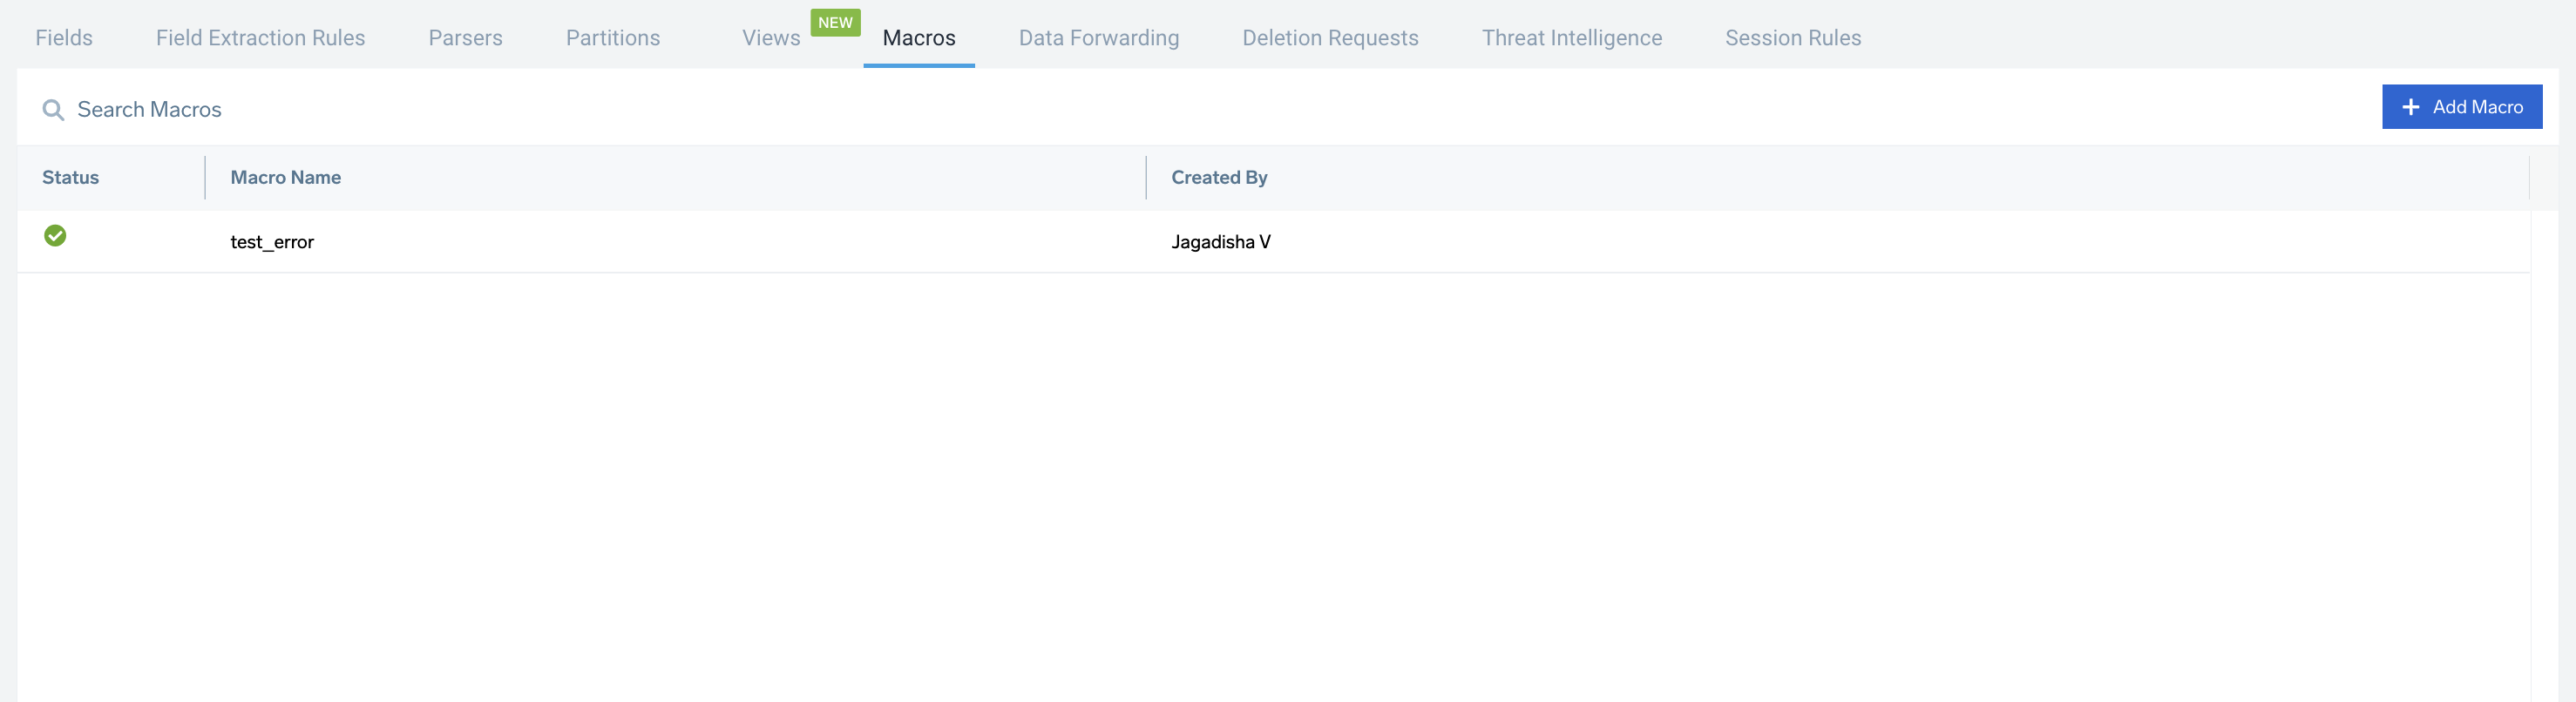
- New UI. In the main Sumo Logic menu, select Data Management, and then under Logs, select Macros. You can also click the Go To... menu at the top of the screen and select Macros.
Classic UI. In the main Sumo Logic menu, select Manage Data > Logs > Macros. - On the Macros page, click on any of the macros that you want to view the macro details.
- To use the selected macro in your log search query, copy the suggested Usage of the macro.
- On the Log Search page, enter your query and add the copied macro directly into the query syntax. Alternatively, you can type ` to open the macro suggestions dropdown and select the desired macro to insert into your query.
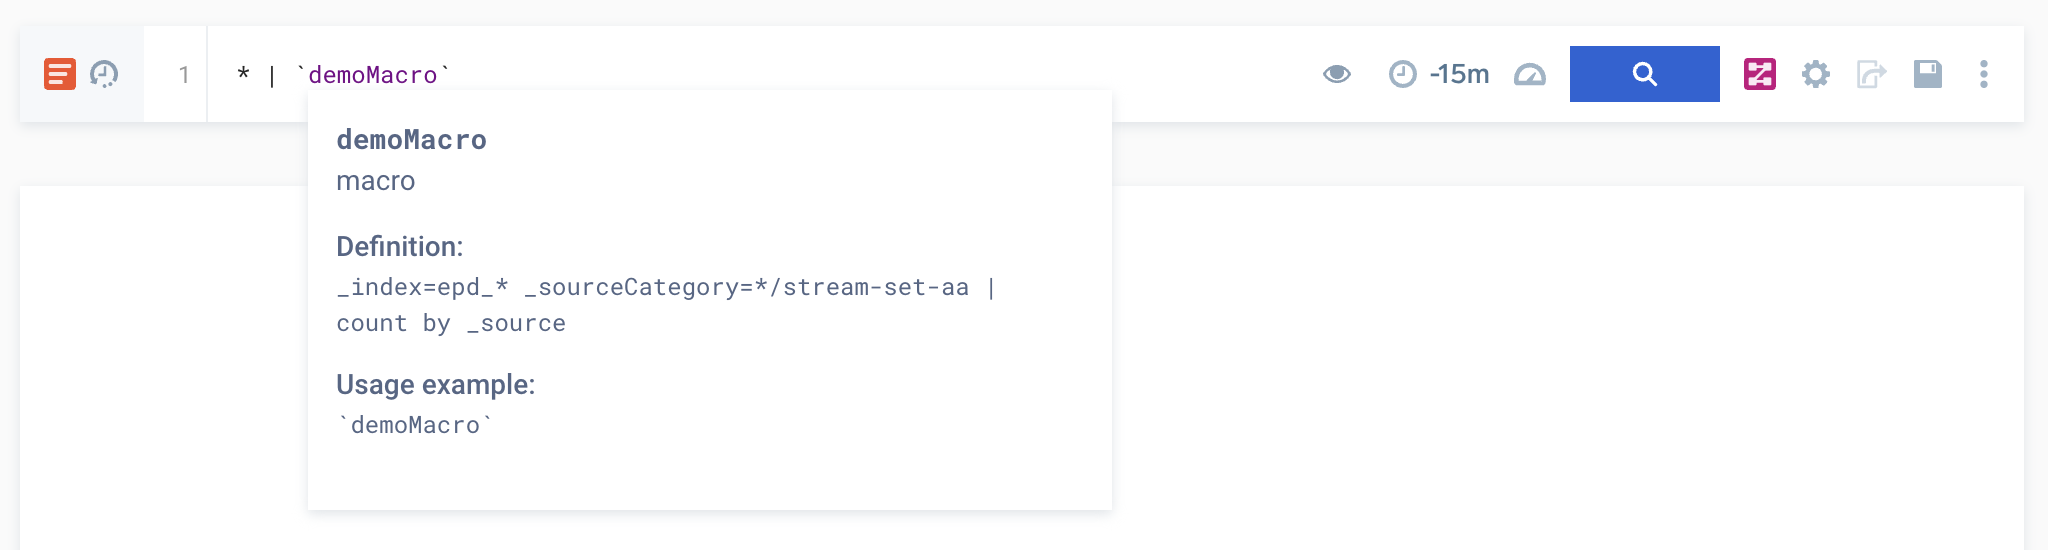 info
infoYou can hover over the pasted macro to view and verify the macro name, definition, and usage details before use.
Macro recommendations
Macro recommendations are automatically generated based on the most frequently run queries within your organization. By converting these recommended queries into macros, you can streamline repetitive tasks and improve overall efficiency.
Users with the View Macro capability can only view macro recommendations. To accept (+ Add Macro) or reject a recommendation, you must have the Manage Macro capability.
Follow the below steps to view the macro recommendations:
- New UI. In the main Sumo Logic menu, select Data Management, and then under Logs, select Macros. You can also click the Go To... menu at the top of the screen and select Macros.
Classic UI. In the main Sumo Logic menu, select Manage Data > Logs > Macros. - Click on the
 button to open the Macro Recommendation page. This page displays recommendations based on most frequently run queries in your org.
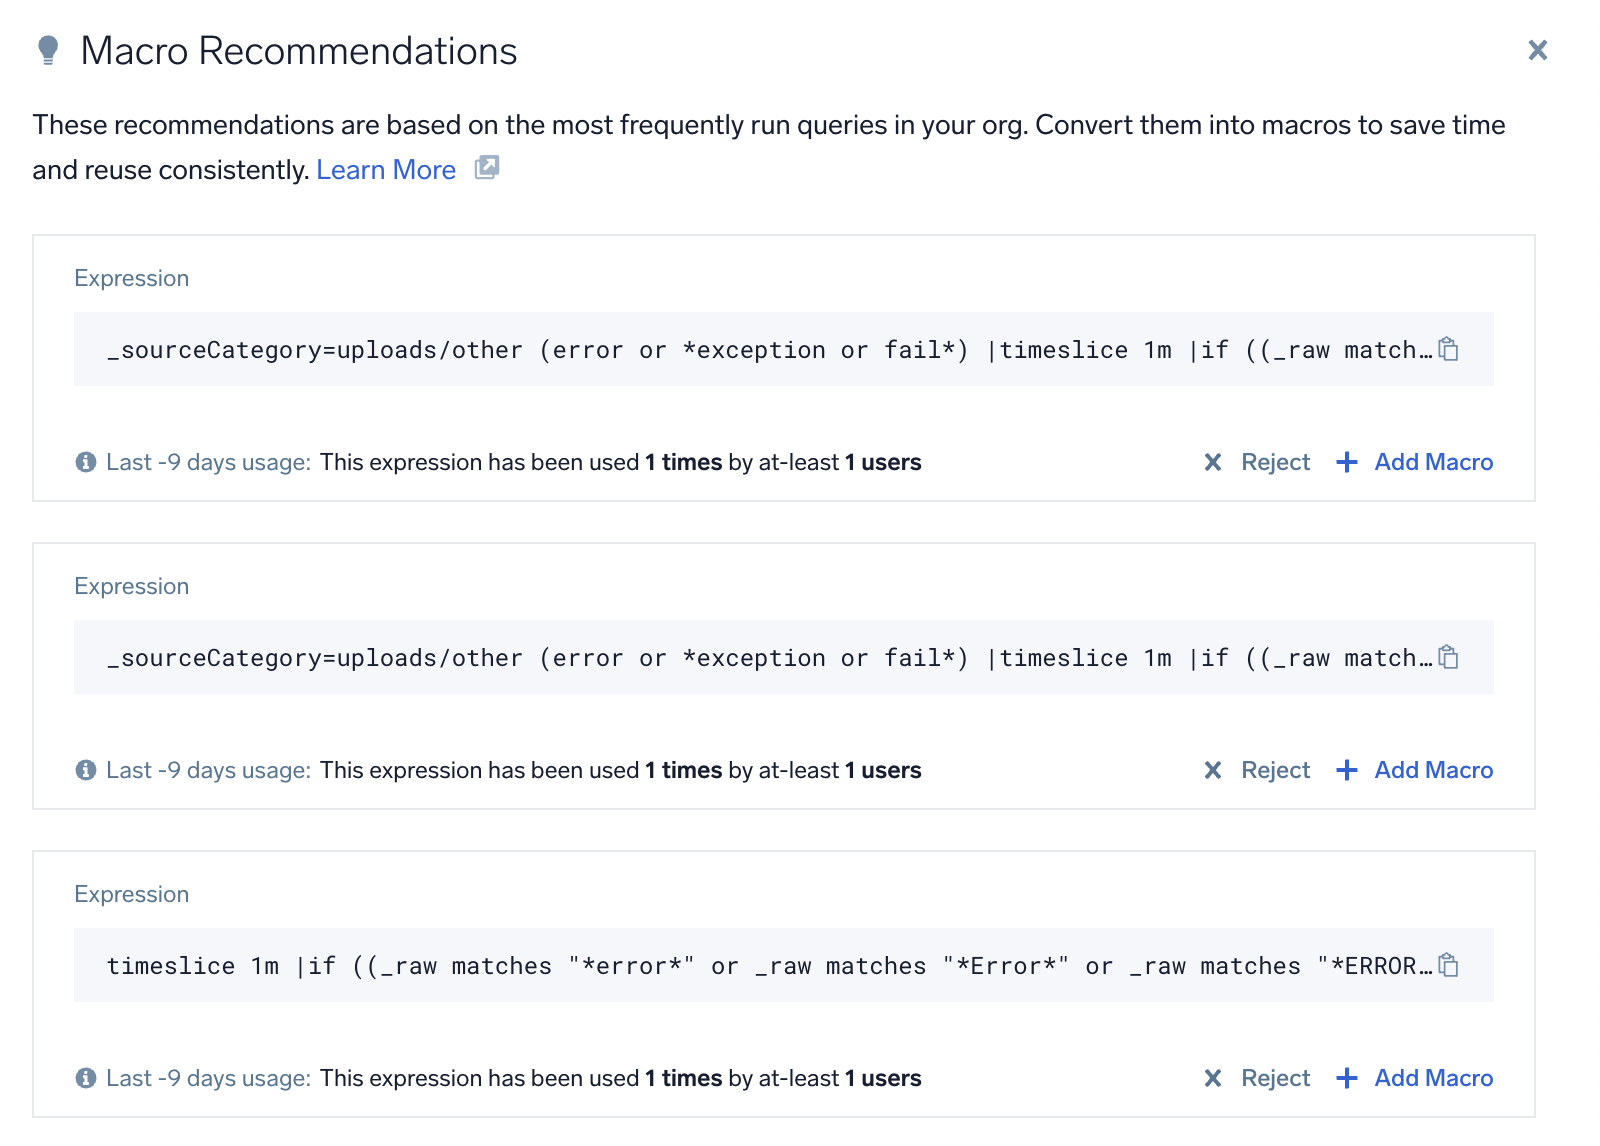
- Click Reject to remove a macro recommendation from the list.
- Click + Add Macro to accept the macro recommendation. You will be redirected to Create Macro page, where you can follow the instruction in the Add a macro section to complete the macro creation process.
Edit a macro
- New UI. In the main Sumo Logic menu, select Data Management, and then under Logs, select Macros. You can also click the Go To... menu at the top of the screen and select Macros.
Classic UI. In the main Sumo Logic menu, select Manage Data > Logs > Macros. - On the Macros page, click on any of the macros that you want to edit.
- Click Edit button to open the pane for editing.
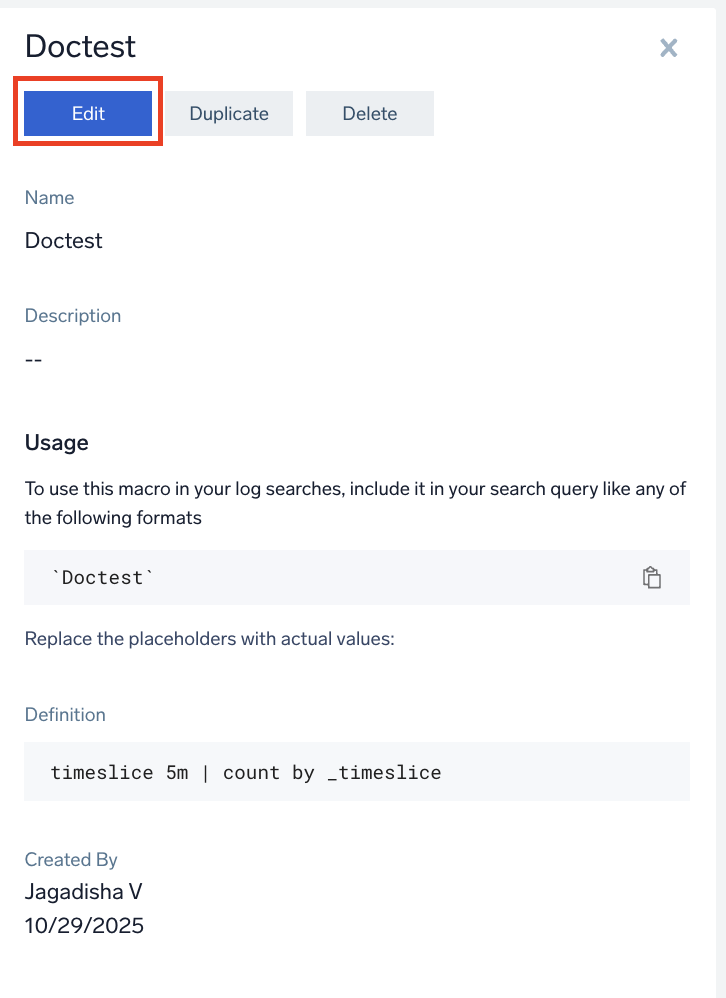
- In the Edit [macroname] macro pop-up, click on Continue. You can also check where your macros have been used to avoid broken queries by clicking on check queries that reference this macro.

- In the macro editing pane, perform the required editing and click Submit.
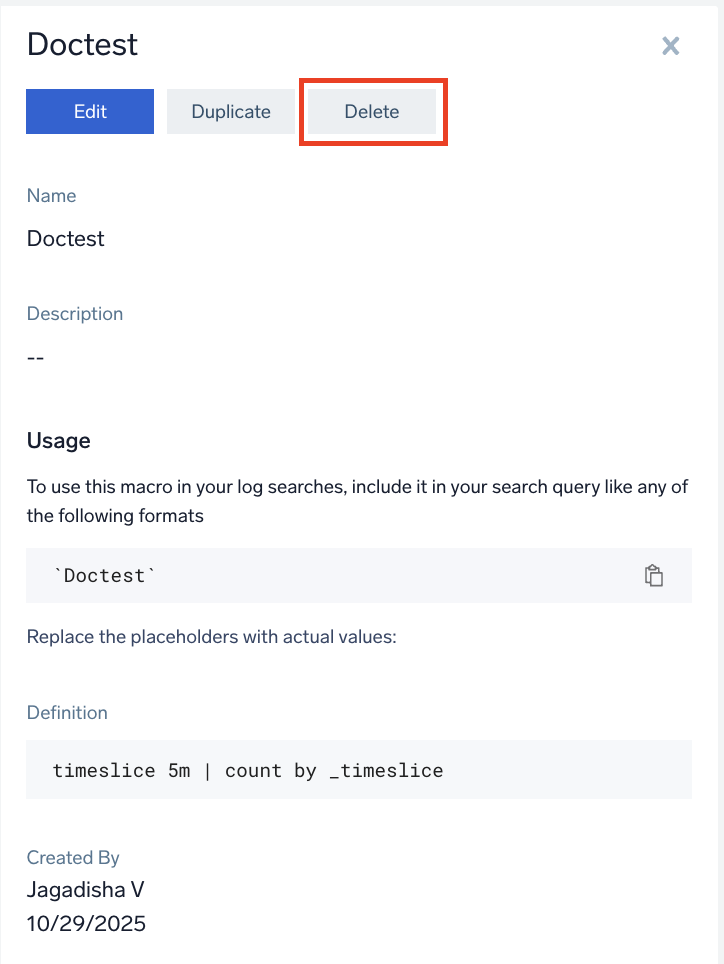
Delete a macro
- New UI. In the main Sumo Logic menu, select Data Management, and then under Logs, select Macros. You can also click the Go To... menu at the top of the screen and select Macros.
Classic UI. In the main Sumo Logic menu, select Manage Data > Logs > Macros. - On the Macros page, click on any of the macros that you want to delete.
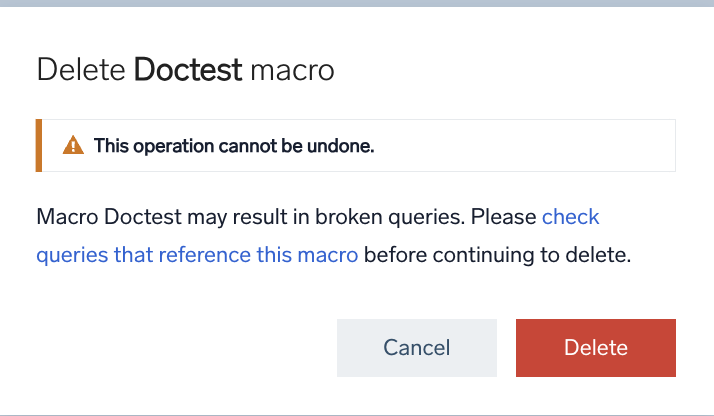
- Click Delete button to delete the macro.
- In the Delete [macroname] macro pop-up, click on Delete. You can also check where your macros have been used to avoid broken queries by clicking on check queries that reference this macro.