 Meet the new
 LaunchDarkly

Version: 1.2
Updated: August 14, 2026
LaunchDarkly is a feature management platform that enables teams to control feature flag rollouts, targeting rules, and environments. This integration correlates feature flag changes with production incidents, inspects flag and environment state across projects, and executes remediation actions such as toggling flags or updating targeting rules.
Actions
- Get Audit Log Entry (Enrichment) - Retrieve details of a specific audit log entry, including who made a change, what was changed, and when.
- Get Environment (Enrichment) - Retrieve configuration details for a specific environment within a project to determine which environment is impacted during an incident.
- Get Feature Flag (Enrichment) - Retrieve the targeting configuration and variations for a specific feature flag.
- Get Flag Status (Enrichment) - Retrieve the current status of a feature flag (active, launched, or inactive) for quick triage.
- List Audit Log Entries (Enrichment) - Retrieve a list of audit log entries to correlate feature flag changes with incident timelines.
- List Environments (Enrichment) - Retrieve a list of environments for a project to map environment names to Sumo Logic source categories.
- List Feature Flags (Enrichment) - Retrieve all feature flags for a project to identify how many flags exist and which ones changed within an incident window.
- List Flag Changes (Enrichment) - Retrieve the audit log filtered by a specific flag key to surface all changes made to that flag during an incident window.
- List Projects (Enrichment) - Retrieve a list of LaunchDarkly projects to discover and map services.
- Toggle Feature Flag (Containment) - Disable or enable a feature flag as a kill switch to stop an offending flag from affecting production.
- Update Feature Flag Targeting (Containment) - Revert targeting rules for a feature flag, such as rolling back percentage rollouts or segment targeting.
LaunchDarkly configuration
The following steps show how to create a LaunchDarkly API access token for use with Sumo Logic automation.
- Log in to your LaunchDarkly account.
- Click your profile icon in the upper-right corner, then select Account settings.
- Select the Authorization tab.
- Click Create token.
- Enter a name for the token and select a role. For full integration capabilities, select the Writer role or higher.
- Click Save token.
- Copy the token value. This is only displayed once — store it securely.
Configure LaunchDarkly in Automation Service and Cloud SOAR
Before you can use this automation integration, you must configure its authentication settings so that the product you're integrating with can communicate with Sumo Logic. For general guidance, see Configure Authentication for Automation Integrations.
How to open the integration's configuration dialog
- Access App Central and install the integration. (You can configure at installation, or after installation with the following steps.)
- Go to the Integrations page.
Classic UI. In the main Sumo Logic menu, select Automation and then select Integrations in the left nav bar.
New UI. In the main Sumo Logic menu, select Automation > Integrations. You can also click the Go To... menu at the top of the screen and select Integrations. - Select the installed integration.
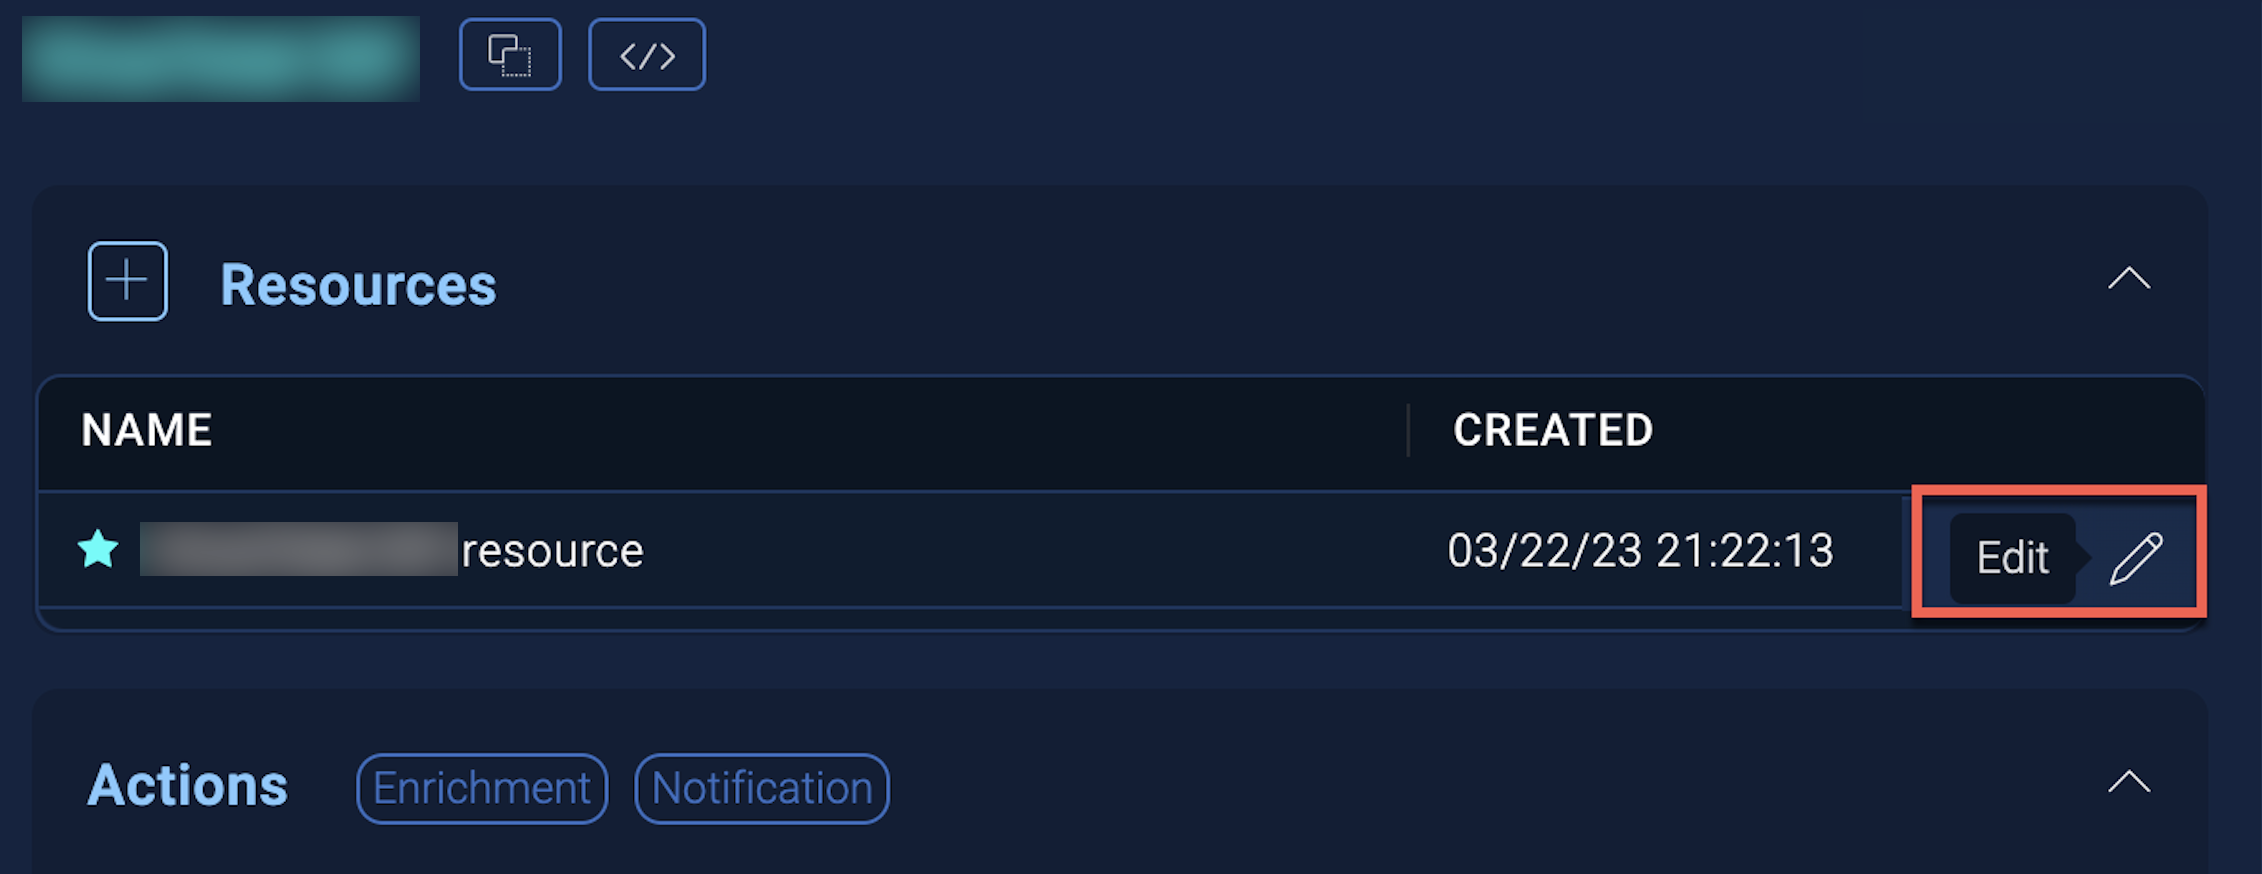
- Hover over the resource name and click the Edit button that appears.
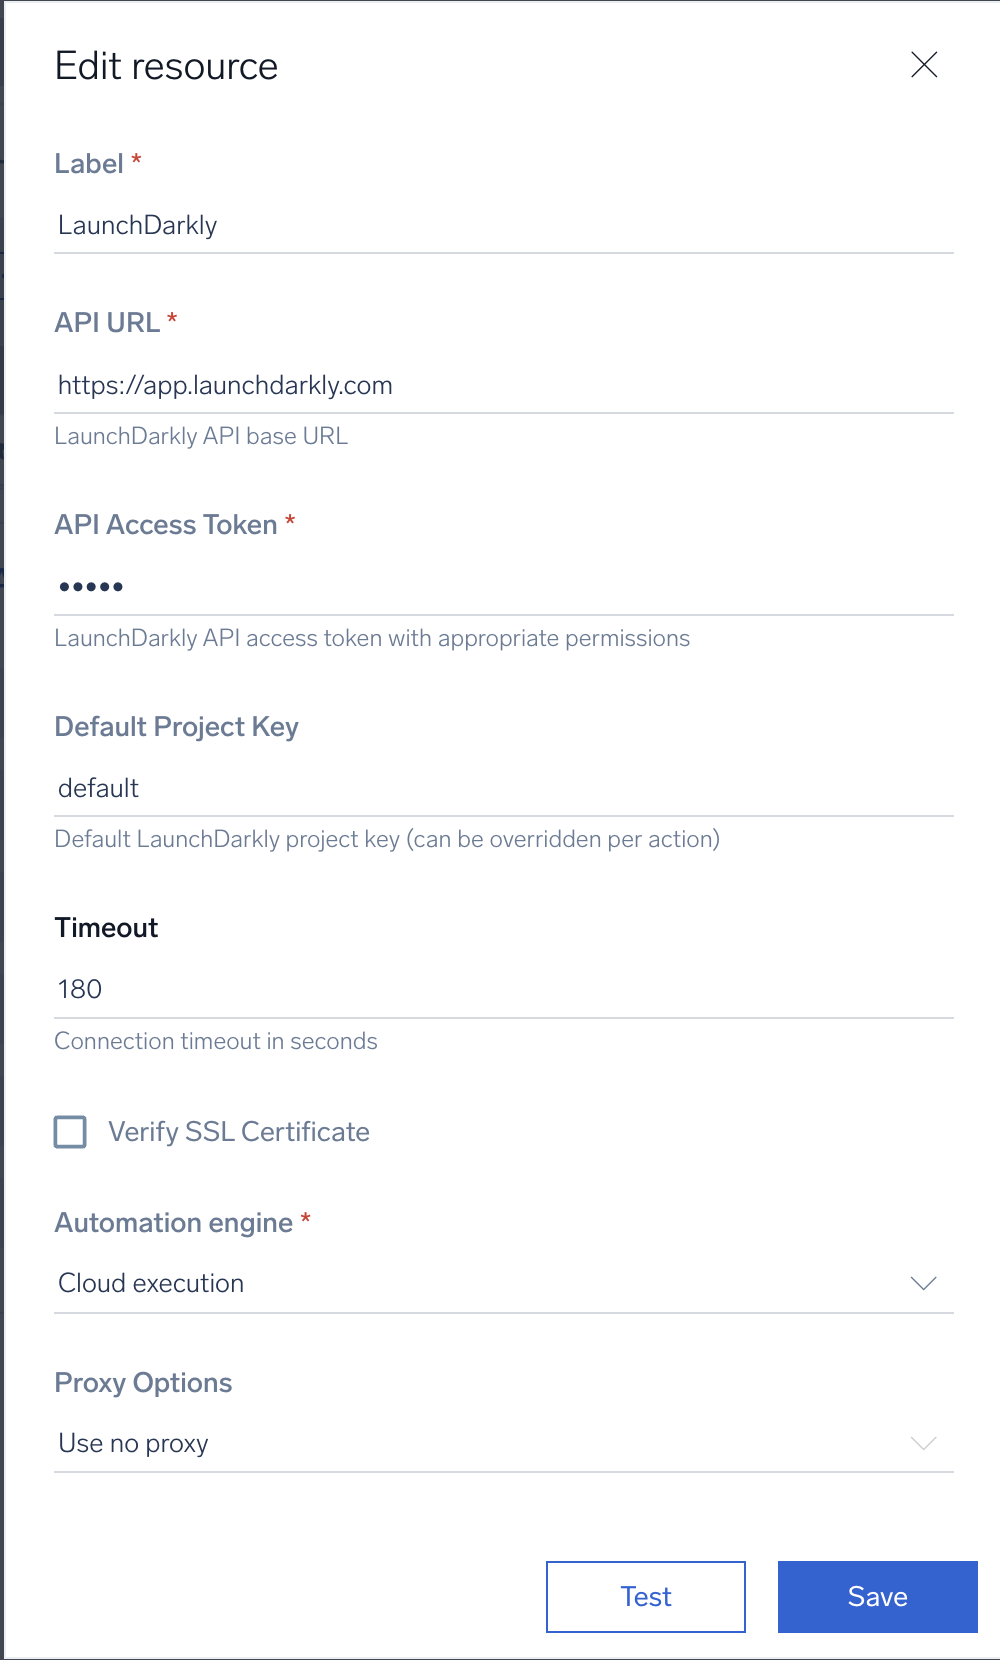
In the configuration dialog, enter information from the product you're integrating with. When done, click TEST to test the configuration, and click SAVE to save the configuration:
-
Label. Enter the name you want to use for the resource.
-
API URL. Enter the LaunchDarkly API URL. The default is
https://app.launchdarkly.com. -
API Access Token. Enter the API access token you created in the LaunchDarkly configuration section above.
-
Project Key. Enter the default LaunchDarkly project key.
-
Connection Timeout (s). Set the maximum amount of time the integration will wait for a server's response before terminating the connection. Enter the connection timeout time in seconds (for example,
180). -
Verify Server Certificate. Select to validate the server’s SSL certificate.
-
Automation Engine. Select Cloud execution for this certified integration. Select a bridge option only for a custom integration. See Cloud or Bridge execution.
-
Proxy Options. Select whether to use a proxy. (Applies only if the automation engine uses a bridge instead of cloud execution.)
- Use no proxy. Communication runs on the bridge and does not use a proxy.
- Use default proxy. Use the default proxy for the bridge set up as described in Using a proxy.
- Use different proxy. Use your own proxy service. Provide the proxy URL and port number.
For information about LaunchDarkly, see LaunchDarkly documentation.
Change Log
| Version | Date | Description |
|---|---|---|
| v1.2 | August 14, 2026 | Initial release of the LaunchDarkly integration. |